Main Screen
PHD Guiding is designed to be easy to use and to take the frustration out of auto-guiding. The main screen looks like this.
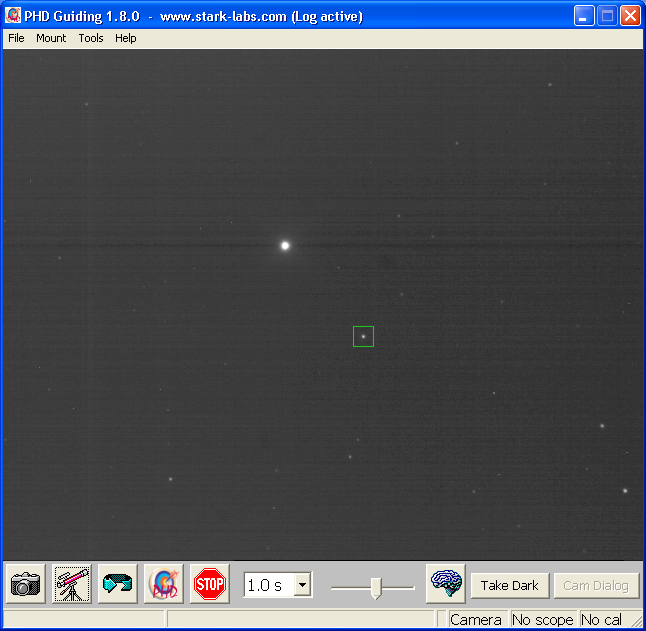
The majority of the screen is taken up by the display of your starfield. No matter what sized image your guide camera captures, it will be resized to fit into this window for display purposes only. Likewise, no matter what exposure duration you use, the image will be automatically stretched to show you viable stars for display purposes only. Internally, all spatial and intensity resolution are not altered. The view shown is designed to show you your whole star field and to show you possible guide stars but internally, PHD Guiding uses the raw data off of your guide camera to maximize guiding accuracy.
Basic controls
Near the bottom of the screen are the main controls. PHD Guiding controlled largely by five buttons and a pull-down list. The five buttons are:
- Camera: Connects to your guide camera
- Scope: Connects to your telescope mount via whatever method selected in the Mount menu
- Loop: Begins looping exposures to let you focus and find a guide star
- Guide: Begin guiding (calibrating if needed)
- Stop: Stops looping exposures or stops guiding.
Next to this, there is a pull-down list of exposure durations (0.05s - 10s). This lets you quickly and easily set the guide camera's exposure duration. Note, that if your camera does not support a duration, PHD Guiding will do its best to emulate that duration. For example, if you use a short-exposure webcam your maximum true exposure duration may be 1/30th of a second or so. If you select "1 s" from the exposure duration, PHD Guiding will automatically acquire images for one second and stack them on the fly, using the resulting stack as the guide frame.
Next up is a slider here. PHD Guiding auto-stretches and auto-scales the display for you to take the hassle out of this. But, sometimes the display is just a bit too bright or too dim. The slider changes the way the stretch behaves (it changes the gamma curve) to let you dial it in to your liking.
Moving on, we have one other button with an icon - a brain here. This button brings up the Advanced Panel, where you can have a bit more control over PHD Guiding's operations. Next up is a button labeled
"Take Dark" in case you wish to use dark subtraction (usually not needed). Finally, if connected to a WDM-style or VFW-style webcam, you'll have a button available to bring up that camera's built-in dialog (that lets you set the camera's exposure duration and other parameters.)
Menu
The most notable entry in the Menu bar is the Mount menu. Here you can select the way you want PHD Guiding to talk to your mount. Your choices here are described in the Telescope Mounts section of the manual. When you press the Scope button, PHD Guiding will attempt to connect to whatever kind of interface you've selected here.
In addition, there is also a Tools menu with various things that may make your life easier. These are all described later in the Tools and Utilities section.
Status Bar
Below the buttons is the Status Bar. The left panels of the Status Bar display messages to the user and will keep you aprised of guiding status. The right panels of the Status Bar indicate whether a camera is connected, a scope is connected, and whether calibration information is known.
Back to (Introduction to PHD)